In this guide topRik experts explain how to avoid mistakes when connecting a charger for marine traction batteries. We remind you that at the topRik marketplace you can buy not only chargers for all types of marine batteries, but also batteries of any type.
Preparing for Installation
Before you start connecting, carefully read the instructions for the charger itself and the batteries used. We recommend drawing up a connection diagram if the charger will be permanently installed on the yacht. If you are installing the yacht's electrical system from scratch, knowledge of layout is absolutely necessary.
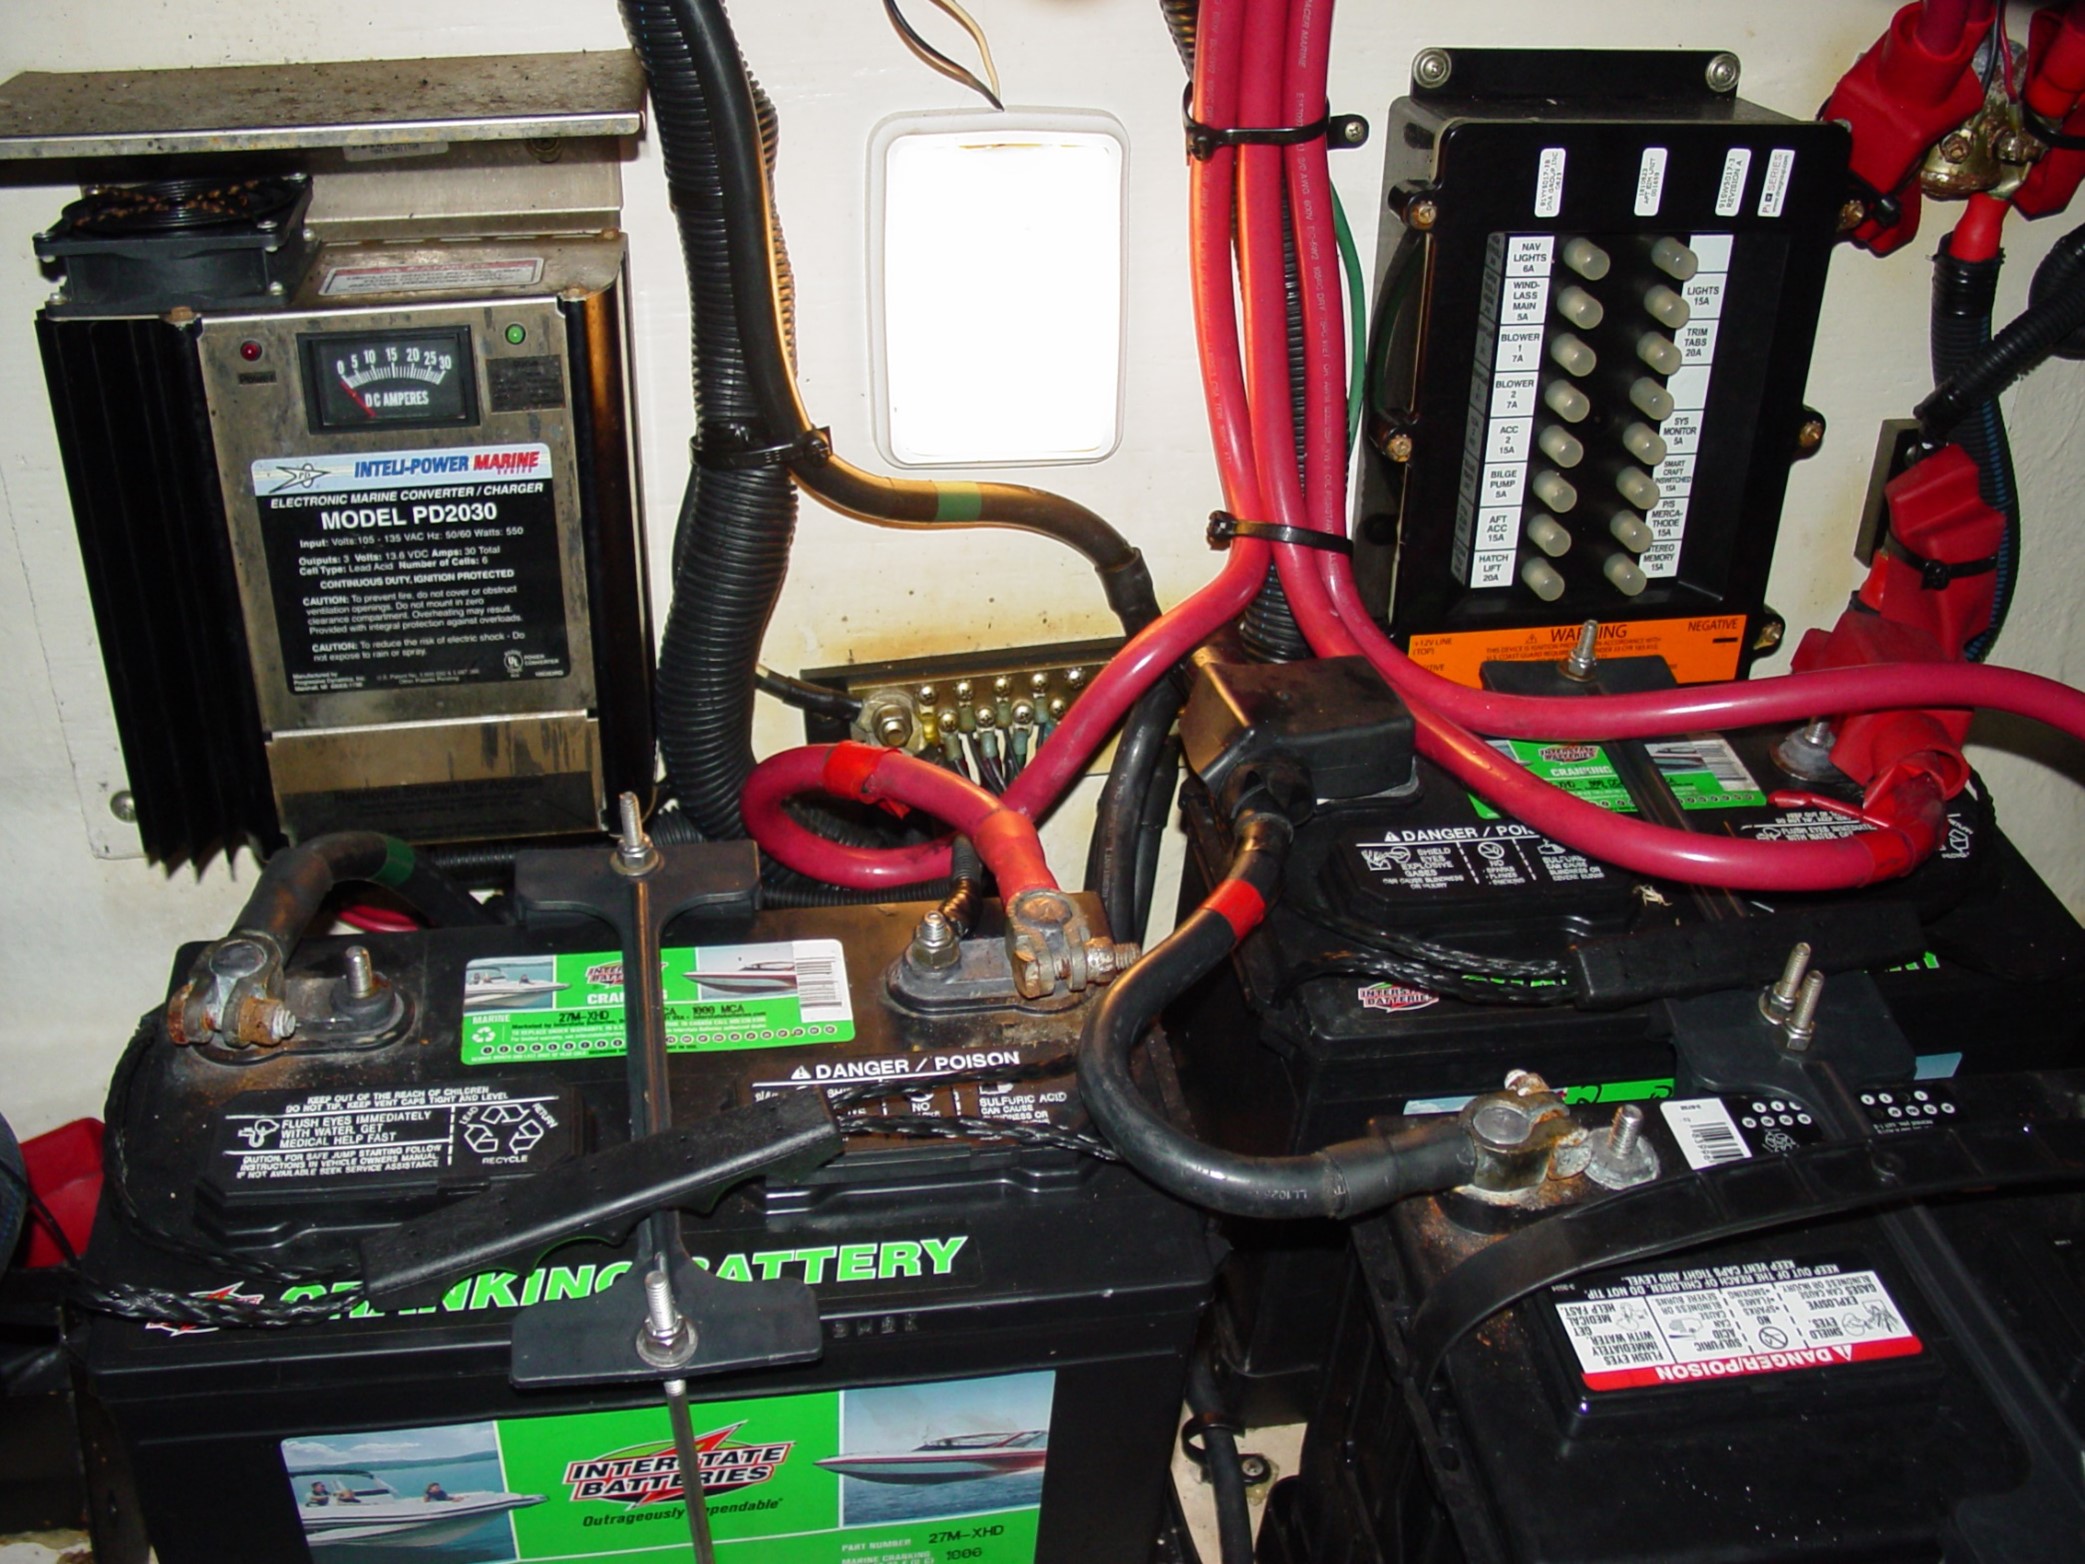
Strictly observe all safety precautions that are provided when working with electrical equipment, as well as with different types of batteries, especially with liquid electrolyte.
Checking the Compatibility of the Charger with the Batteries and the Yacht's Electrical System
Carefully check the compatibility of the plug-in charger with the batteries and the entire electrical system of the yacht.
A charger designed for example for charging lead-acid batteries, sealed, gel and AGM batteries is connected to an AC source and to the batteries in strict accordance with the instructions. Other types of batteries may explode during charging due to an incompatible charger.
Let's compare charging using different types of 12 V batteries as an example.
As you know from our previous publications, lead-acid batteries are usually charged in three, five or seven stages, the main ones being three.
- First, with a low direct current (0.1–0.3 C).
- When the current increases the terminal voltage to 13.8 V (2.3 V per cell), charging continues using the constant voltage maintenance method.
- At the very end, a "float charge" method can be used to prevent self-discharge.
Lithium-ion batteries are charged similarly, except for a higher current (0.5-1 C) and a narrower range of permissible voltage. In addition, the final "float charge" mode is not needed, since self-discharge is negligible.
Li-Ion charger should not allow this to happen, as there is a risk of overheating and "thermal runaway".
Using the wrong charger can sometimes damage the battery cells due to differences in the way the charging stages are controlled. As a rule, Li-ion traction batteries are protected from overcharging by their own control boards (BMS). However, manufacturers do not recommend experimenting, because the electronics may malfunction. It is much safer to immediately use a charger with a suitable charging profile.
Preparation of Necessary Tools and Materials
Usually, chargers from famous manufacturers, whose products are presented in our marketplace, are equipped with a full set of wires, fuses and insulating materials. Carefully read the instructions and decide whether you have all the materials. If the set is incomplete, restore the missing materials.
All parameters of wires and necessary fuses are specified in the instructions. Only multi-core copper conductors are used on boats. Insulation must be resistant to oil, and its material must not support combustion in the absence of flame. The permissible heating temperature of insulation for conductors passing inside the engine compartment must be higher than 70 °C.
Check the condition of the battery terminals and, if necessary, clean them from traces of corrosion.
Always use terminals for connections. Do not wrap bare wire ends around screws or press them against the terminal plate. The screw may loosen due to vibration, and the connection resistance will increase. Increased resistance will cause the contact to heat up and possibly cause a fire. Use ring or fork-type cable lugs. Fork-type lugs must have curved edges to prevent the wire from falling out when the contact loosens.
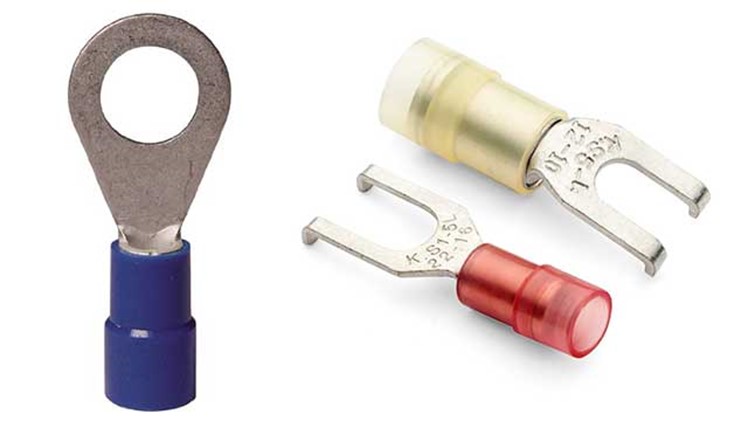
In electrical connections on a boat, soldering is allowed, but it should not be the only means of connecting the wire to the terminal, the terminal must be additionally crimped. Solder creates a seal, the wire in this place is no longer flexible and resistant to bending and vibration.
Never use bolts and nuts to connect wires on a boat! This type of connection is too unstable to vibration and corrosion.
Seal the contacts with a good waterproof sealant - it prevents water from getting into the connection and moisture from penetrating into the insulation.
Mentally walk through the installation process in advance to ensure you have all the materials in sufficient quantities and the right tools.
Determining the Charger’s Location on a Yacht
The main thing when choosing a place to install a charger is accessibility, especially if we are talking about a device that requires manual switching to comply with the charging algorithm. There should be at least 20 centimeters of free space around and in front of the charger.
Ventilation is important not only for lead-acid batteries with liquid electrolyte. It should be noted that waterproof AC-DC and DC-DC chargers, as a rule, do not have forced cooling and heat up during operation. Such devices are cooled by convection and heat transfer. Therefore, it is advisable to install them on a metal surface at a distance of 15-20 cm from other equipment and in a ventilated place.
Protection from moisture and corrosion is also important for both battery cells and the charger.
Please note that the topRik marketplace offers batteries equipped with protective covers, as well as chargers with a protection class of up to IP 67.
Turning Power Off
Before starting installation work, it is advisable to turn off all power sources to all electrical equipment on the yacht. This is easy to do if the yacht is in a closed hangar. But some devices on the boat should always remain on, even when other electrical equipment is turned off, for example, some types of side lights - when moored.
Therefore, the pump, traction battery charger, solar panels or alarm systems are not connected via the main switch. 24-hour devices are connected to a separate bus, which is fed by a cable protected by a fuse. The cable is connected to the main switch on the battery side. Each circuit coming out of this bus, in turn, has its own fuse.
Connecting the Charger to the Battery
The step-by-step guide to connecting the positive and negative wires to the battery comes down to a simple algorithm.
- Determine the polarity of the battery, it is important not to mix up the terminals.
- Connect the charger wires to the battery terminals. First, you need to secure the positive wire (usually it is red), then the negative wire (usually it is black).
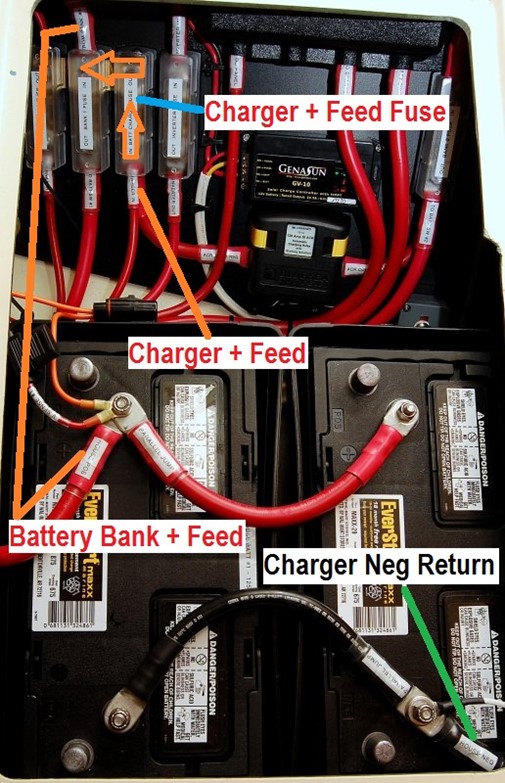
However, mistakes do happen. The result can be a violation of polarity, or reversal of the battery, which can lead to a short circuit, damage to the battery, or even an explosion. Therefore, carefully connect the appropriate terminals, since chargers, as a rule, do not have protection against inappropriate polarity of the connected batteries.
Connecting the Charger to a Power Source
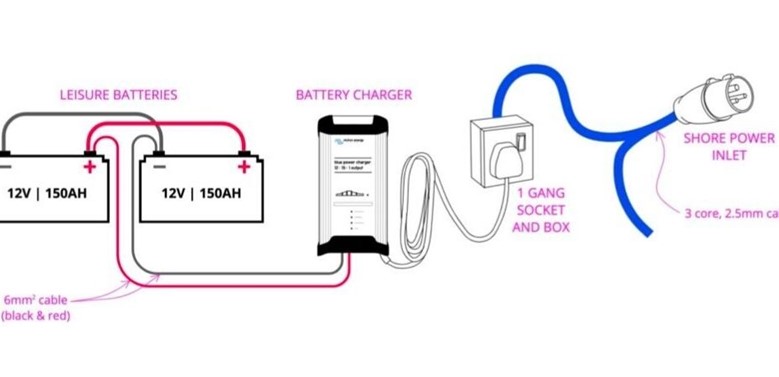
The boat charger can be powered by shore power, and on the yacht itself - by a stationary or portable generator, diesel or (less often) - gasoline. You can read about all types of yacht generators in our blog - topRik experts have written about this many times, and our marketplace presents all types of generators that, together with a properly selected charger, will provide your boat batteries with reliable power supply. Therefore, we will dwell in more detail on the problems of shore power supply.
Connecting the Charger to Shore Power
Successful installation of electrical wiring in your own apartment or country house does not mean that you will do this work correctly on a boat or yacht. There are fundamental differences in the rules for installing AC devices on shore and on a vessel, which we will not discuss in this article. We will limit ourselves to the topic of connecting the charger.
It is not common practice to install AC inlet switches on boats and yachts. Many owners consider the boat to be another “device” connected to the marina circuit, which is already protected. But faulty wiring on public piers is all too common and it is not worth trusting your safety to an unknown protection device located several hundred meters from the boat.
The main circuit breaker on a boat or yacht must be two-pole. Unlike a single-pole circuit breaker, it protects the circuit when the polarity is reversed on the shore. For a simple circuit, one circuit breaker is enough. In a circuit consisting of several parallel branches, each of them must have its own circuit breaker.
A multi-stage charger or inverter and charger will make it easy to connect AC devices to shore power.
Use of Appropriate Fuses and Circuit Breakers to Protect the System
Modern chargers often have two or three outputs. No isolation relay is required to distribute the current from such devices. However, if the system provides for charging the batteries from the engine generator, an isolation relay is installed. Will there be a conflict between the relay and the charger in this case, and will their uncoordinated operation affect the quality of battery charging?
Typically, multi-output devices have a single charging profile and move to the next stage after the previous stage is completed for all connected batteries. The additional connection via a relay in this case makes almost no difference to the system. The only thing that will happen is that the starter battery will remain in the absorption stage longer than it needs to, waiting for the service battery to fully charge. But if the charging profile is not too aggressive, this will not cause much harm to it.
In expensive microprocessor devices, independent voltage regulators are sometimes installed for each group of batteries, and the outputs can be connected sequentially during charging. For example, the first battery is charged for a certain period, then the device disconnects it and connects the next one. Each group of batteries has its own voltage and charging current.
Suppose the user has set up different charging algorithms for each output in such a device. The first is configured for gel batteries, the second for wet batteries, and the third for lithium batteries. In this case, the relay will cause conflict and destroy the benefits of using a sophisticated charger. A charging algorithm that is ideal for one battery will become too aggressive and therefore harmful to another. To prevent this from happening, it is necessary to disconnect the relay while the charger is running. There are several ways to do this, but one can install a digital isolation relay. Devices of this type can be programmed to operate in one direction.
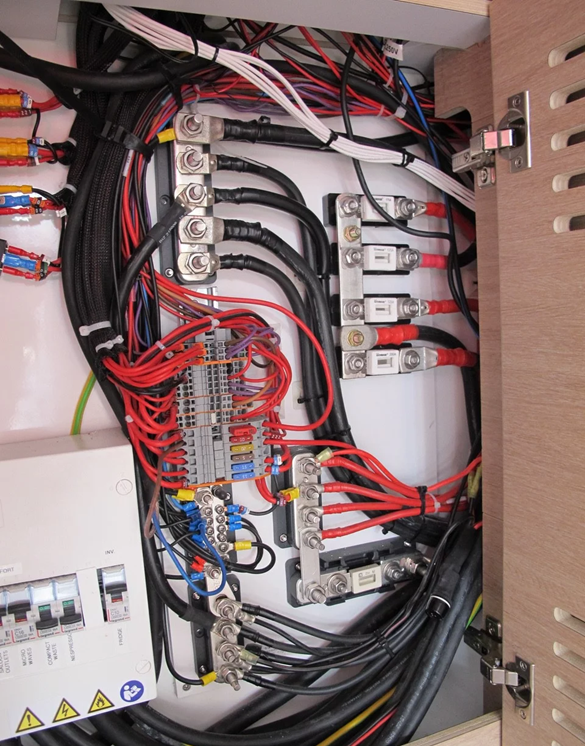
In addition to relays, there are other battery isolation devices designed to charge two or three batteries from a single charging source - a generator or a single-output AC charger, including:
- four-position rotary switch with manual switching;
- diode isolators;
- battery separators on MOSFET transistors.
Battery disconnect switches can also be used in circuits with voltages from 12 to 48 V and a maximum continuous load of up to 500 A.
Models are available for disconnecting one or two conductors at a time, some devices are equipped with a lock or a removable key that prevents accidental switching on. Switches with a flanged body allow for concealed and surface-mounted installation.
There are different types of battery switches:
- single-pole;
- bipolar;
- combined.
Before installation, check the equipment manufacturer's recommendations for fuse selection. Remember: these fuses are designed to protect the wire leading to the device, not the equipment itself.
Generators, solar panels and chargers are technically power sources. To comply with standards, cables leading from them must be fused within 200mm of the device.
Tips for Routing and Keeping Wires Safe and Protected from Moisture
Run the wires starting at the battery. Move to each fuse box and bus bar, then connect the equipment. Follow the color codes and wire markings at both ends. If you deviate from the diagram created during the yacht electrical system design phase, make changes to ensure the diagram remains current in the future.
Setting Up the Charger
Once the installation is complete, configure the charger depending on its type. Any user manual will describe the step-by-step algorithm for this process. In addition to the basic characteristics common to all types of chargers, you can choose a device that requires:
- adjustment of charging parameters depending on the type of batteries – lead-acid with liquid electrolyte, AGM, gel, lithium-ion;
- setting up a multi-stage charging process – bulk, absorption, float;
- enabling and configuring additional functions – temperature compensation, automatic shutdown, etc.
The latest generation chargers presented in our marketplace are provided with various built-in protections at the input and output, as well as against excess charging current, short circuit, and overvoltage.
Problems and Solutions when Connecting
Before checking a charger that is not working after connection, make sure that all consumers are disconnected from it, and only then proceed to identify installation errors. The most common problems that can be detected after connecting the charger to boat batteries are lack of charging and unstable voltage.
If the charger does not work, check that the voltage matches the one required by the instructions. The reason may also be a blown fuse at the input.
If the battery does not charge completely, the cause may also be abnormal voltage at different stages of charging. Also check the output fuse (if it is burnt out, replace it). The cause of this problem may be increased battery temperature - connect a temperature sensor. Excessive battery capacity may also be the cause of undercharging - you will have to replace it with a battery of lower capacity.
If the battery is overcharging, the cause may be that the charger is set to a constant high voltage mode or the high or float voltage value is not set correctly at different stages of the process.


